Monday, February 26, 2007

Wip and Fo


I finished a pair of socks for Vikki, the wonderful woman who is teaching me wig making. She was really happy with them and thought I had made a perfect choice of design and fiber. I used Bare superwash Donegal yarn from Knitpicks and the Aran Braided Sock Pattern by Susan Lawerence. I really enjoyed making these and was so happy that Vikki was pleased.


Last Saturday I took a class at Black Sheep Knittery on 2-handed Fairisle. It was 'taught' by the owners of Philosopher's Wool, Eugene and Ann Bourgeois. I use the word 'taught' loosely because I could have learned this amazing technique in 5 minutes. The 3 hour class was mostly a long rambling autobiographical sketch, a'la Will Rogers. of Eugene's amazing success as a sheep farmer, carpenter and wool processor. I would have enjoyed it much more if I had brought my knitting!

The class write up said we would be given yarn and needles and didn't need to bring anything, but this didn't happen for nearly 2 hours so I sat there, stewing over the fact that I was wasting valuable knitting time. The rest of the class was basically a pitch to buy their kits, which are beautiful and colorful, but their wool is so coarse and scratchy, just knitting on the swatch made me fear my fingers would start bleeding.

Very nice sweaters for skiers, fishermen, or wool farmers in Nova Scotia.

But I am glad I learned the technique. I also feel that I understand steeking now and can take a scissors to my handknitting (I have done cut and sew on Machine knitting, no problem.)

I bought some lovely, soft, merino/cashmere/microfiber blend to make my own fairisle pattern and cast on as soon as I got home. I am just making up the pattern as I go.
Of course, I am adding some texture along with the color. I am using a little mohair, a little ribbon and a little grassy looking stuff from Habu textiles. There will also be embroidery and beads. By the time I get to the armpits, I may just stop, knit the sleeves, and finish the whole thing in the round, which I think gives a better fit than drop shoulders. so maybe it will be a vegetarian sweater - no steek.

Another thing about their technique that I like is the way you weave in the floats every 2nd stitch, so the back looks really beautiful - almost reversible.

Friday, February 23, 2007

Trunk Show Last Sunday

Ellen Bloom did a great job reporting on the Trunk Show last Sunday at A Mano. Read about it here.

Wednesday, February 14, 2007

Valentine's Flowers


Yesterday, these came.


Today these came.
So now, it looks like this.

One is for Valentine's Day. The other is for giving birth on Valentine's Day, 15 years ago. Yes, Eden turned 15 this morning at 1:46 AM.

Sunday, February 11, 2007

It Wasn't the Dress...

It was me!

I am so accustomed to designing clothing that looks good on me, I just assumed that since it didn't look good on me, it wasn't a good design.

I can't tell you what agonies I have been going through regarding my Adult Pansy - making it into a blouse, folding under a hem, seriously considering throwing it into the UFO pile and forgetting about the whole thing. Finally, I put it on the dress form and there was the truth - right in front of my face.

It looks adorable as a dress, just the way I designed it!

I am just not the model for it.

So there you go - I am not the lace mini dress type anymore. I am more the lace-tunic-with-lots-of extra-width-so-it-can-hang drapingly-from-my-shoulders-with-no-flashy-little-trim-around-my-hips type. Not quite Maude, but getting there...

Putting it more positively, I am trading youth and beauty for patience, wisdom and mastery.

So now that this is understood, all I need to do is write and edit the two patterns (flower sock, is the other), format and print them, and get everything ready for my trunk show and class at A Mano this coming weekend.

Also, it is Eden's birthday on Wednesday, with all the festivities that entails. Special dinner on Wednesday and party for his pals on Friday.

Patience, wisdom and mastery are really a better deal than youth and beauty, right?

Sunday, February 04, 2007

Where Have I Been?

In the 3 weeks since I last posted, I have been having "disappointing knitting" and family illnesses.

To begin, my mother, who is basically healthy despite having leukemia, landed in the hospital at near death. A lifelong obsession with her weight (and she has never been more than just 'chubby') has made her, like millions of others, a target for every magazine and television ad promoting herbal diet products, especially if they promise to give you energy and restore your youth. This time it was super strong dosages of Green Tea Extract that thinned out her blood until she had no ability to clot at all.

Thank God she was rescued, transfused, lectured to, and has recovered, and is back home.

I am so angry when I think of how the media and consumerism have led us to believe we are fat, flabby and smelly. Multi-billions are spent to stay young, tight, and smell good.

And then my step-mother discovered that the breast cancer she had last year has returned, despite the mastectomy and chemo, and is in most of her ribs and various other bones and her lymph nodes.

Fuck Cancer. Just fuck, fuck, fuck.

She and my father, who just turned 80, are positive and upbeat. She is on a bridge binge this weekend, determined to earn the few points she still needs to become a life master.

Enough about the illnesses. I could go on awhile about Parkinson's, too, but I won't.

So for the knitting part.
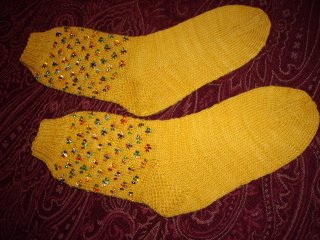
I decided I don't like the beaded sock idea enough to finish the collection. I may still write the pattern for the yellow socks, since they're done.

I made a new design, called ??? Haven't decided yet. I like them much better, but am actually not sure if I like Koigu for socks, after all. Here is a photo:
They have a unique construction, from the toe up, using a seamless cast-on I 'unvented' myself, and knit flat from the ankle up.

Then there was the thing with the publisher from London that wanted to purchase one of my designs for an upcoming book. Due to a short deadline, they were asking all their designers to purchase their own yarn, and wanted me to use Noro Silk Garden Light. They also want each designer to pay for the postage. I negotiated for a slightly higher fee, and they agreed, so I went out and purchased the yarn. Here is the beginning of the design on the needles.
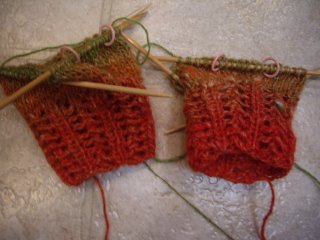
Due to the long repeats in Noro, I decided I needed to buy 3 skeins in order to make the colors match on each hand.

To make a long story short, the person I was corresponding with was not prompt in her responses, waiting 2-3 days to reply to each e-mail, and then not responding to every question. Like why did I need to furnish my bank account info? Couldn't they just deposit my fee into my Paypal account? And could I please have a copy of the contract before I mailed the sample and pattern to them? (No response at all.) So after 3 more days, (5 days before the extended deadline) I dropped out. I have never done this before once agreeing to an acceptance. But I felt miserably frustrated without good communication, and didn't want to pay the huge amount it would cost for overnight delivery to England out of a small fee, made smaller by having to pay for the yarn myself. This would have netted me about $50 for knitting the sample and writing the pattern! Bahhh! Who needs it?

So out of frustration, I began a procrastination project, inspired by a design in Amazing Crochet Lace.
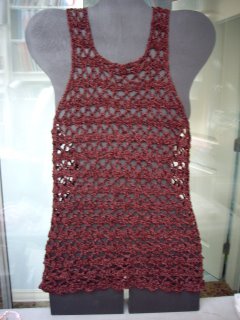
At first I was quite thrilled with this one. I started off with the pattern from the book, but could see the sizing wasn't going to be right after about an hour, so closed the book and worked it 'freeform' as I love to do, ending it at the hemline in a totally different way from the book.

As I said, at first I liked it. Then I wore it (over a black turtleneck sweater) for a day. Received many compliments, and felt good in it. But then the disappointing thing happened... it stretched waaay out, and WORMED!!! I thought chenille wouldn't worm when worked in crochet! The armholes, bound with a row of sc, drooped even lower than they look in the photo. The worming was slight, but noticeable (to me, anyway) Damn!

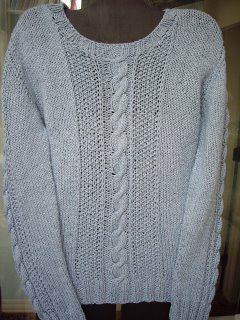
And here's the worst disappointment! the sweater I made Reese for his birthday, from Misti Cotton, (silk and cotton). He loved it and wore it for 2 days straight. It was so soft and fit just right. After 2 days, it was huge and shed all over.

Mea culpa! I should have used smaller needles, knitted at a tighter gauge it might not have stretched so much. The shedding? I don't know if that could have ever been remedied. Is this yarn good only for scarves???

Figuring I had nothing to lose, I threw it in the washer and dryer. After about 20 minutes, I checked it and discovered it was getting even longer in the dryer! so I took it out and dried it flat. I had temporarily forgotten that my dryer has a sweater rack.

It didn't shrink. All that happened was the fiber got worn out looking (you can't really tell from the photo). Now it looks like it has been worn for years. He'll never wear it again. He likes to look perfect at all times - even color coordinated clothes and shoes to wash the car! I guess I could wear it with jeans but the sleeves are at least 6" too long and I am so sick of it, I don't even want to work on it again!
And my last disaster(?) is this sweater I've been working on for my pattern line. Entitled "Adult Pansy Blouse", it is a derivative of this:
Child's Pansy Dress


I started and worked for days and then ripped this one twice before I finally decided on the correct gauge, stitch count and body style. One of the things I love about Koigu; it is a hearty yarn that can withstand multiple rippings and blockings.

But after all this, I'm still not sure if I like it. Most disappointing is that the crocheted pansies for the hemline look AWFUL! The hemline with no pansies looks TERRIBLE. The only thing that looks right is a folded hem (pinned in the photo) This is a technique I have never seen in a knitted pattern and yet - it really works on this design. It gives the hemline the body it needs to stand away from the hips slightly - which is falttering to the wearer, and at the same time, preserves the airy nature of the knitted lace.

As I was bemoaning this piece to my dearest, he responded, "Break new grounds! You are the decider!" or something to that effect, and he is right, I guess.
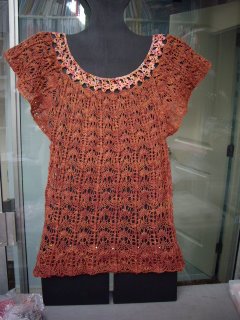
The only thing it needs besides the hem sewn in is the beading around the top. Please let me know if you think this one is worthy of completion and the hours of sweat and tears that go into writing, grading and printing a pattern.


WIG WIP (Work in Progress)


Friday, January 12, 2007

Knitting This Week


A pair of Snowflake Lace Socks by Melanie Berney from Magknits. Made in Fleece Artist in the softest pastel handpaint. Maybe a little too muted. The yarn almost looks like something bled on it in the wash, but I love it and am very happy with this project. It is so relaxing to me to knit someone else's pattern and this one was beautifully written.

Another procrastination project - a pair of baby booties for my God-daughter, Stephanie, who just found out she is expecting her 2nd child! A sweater is already floating around in my imagination and will no doubt come forth from the needles before her due date. This pattern was from a new book I just bought, Socks, Socks, Socks, and was designed by Maude Smith. It was a very quick detour from the new designs I can't show you yet, and I plan on making up more of the socks in this book when I need relief from math and designs that I can't get to come out exactly right for the 15th time.

On Wednesday morning I taught a Needle Felting Class for the Pomegranate Guild, a group of Jewish needleworkers.


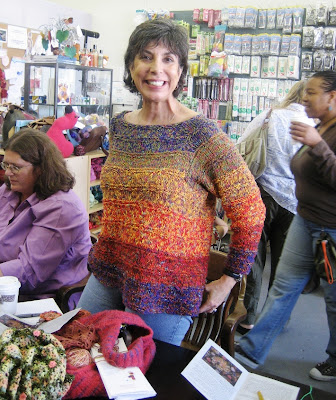
I know I said I'm not teaching anymore, but my friend Gloria Ilan (above, on the right) caught me at a moment when I couldn't say 'no'. Yes, I do have those rare moments - just ask Eden. He takes advantage of them as often as possible.

Never having been enthusiastic about needle felting, I nonetheless felt (!) it would be something the ladies would enjoy and they did! Brandi, at Stitches From the Heart, gave me a brief lesson and loaded me up with supplies the day before, and off I went, after searching in vain at 4 different 99 cent stores for those foam noodles that kids use in the swimming pool. Brandi said that they made a good and cheapo substitute for the $18 needle felting brushy base that Clover sells. But I guess they are out of season, so balls of yarn were used by those who didn't wish to purchase a brushy base and they worked just fine.


Final words on this subject - I still do not like needle felting and will never do it again. If I am going to spend time embellishing things, I much prefer applique, beading, embroidery, or just about anything else.


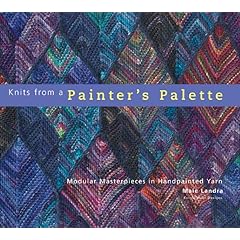
I got this book this week and it is yummy. I heartily recommend it to anyone who is fond of modular knitting and doesn't mind spending the next year and a half on one project! Every Koigu pattern that has already been published (and sold for $20) is included plus more, and this time with professionally rendered charts and (hopefully) better instructions. I was fascinated to read the story of how Koigu came to be.


And finally - look what came in the mail today! An amazing selection of yarns from Blue Moon Fiber Arts! Home of the fabulous yarn, Socks that Rock. Maybe you have heard about the banking fiasco Tina suffered the other day when so many people paid her $210 to join the Sock o' the Month Club that the bank freaked out and decided it was a scam! And in the course of fixing that, Tina contacted me and we chatted - one thing led to another - and maybe there will be some Ellene Warren Designs for Blue Moon Fibers! There is nothing that inspires me more than yarn and yarn that has been hand-dyed by a real artist is the best of all.

Wig Making This Week


No, it's not another moustache (one was quite enough for me right now) I was eager to get on with the real deal! Remember, last week I learned how to make a custom cap and pad out the head block. If you click on the photos, they will enlarge and you can see the seams and darts. This is not the way Victoria makes her caps. I am trying an experiment on this one, using my 18 plus years of experience covering human breasts with fabric, and applying what I learned to the silk mesh (called 'lace) used for wig caps. For us knitterly types, 'lace' has a different meaning!

Heads are actually easier than boobs. Larger (mostly) but without the added complexity of having to hoist them up and keep them in place!
See the tiny teeny weeny little mesh spaces. The hairs are tied on individually to the thread that forms the mesh. The black lines you see are on the taped form underneath the mesh. These lines are used to keep the form aligned. You slash the tape perpendicular to the black line, stuff in batting, using a dental spatula, and then re-tape, making sure the lines come back together perfectly. This way, there is no distortion of the head. Hopefully. The lace cap must fit perfectly smoothly to the taped form.

Transparent nylon thread is used to sew the seams (semi flat feld seams) and darts. Vikki and her girls use the ventilation hook to sew the seams. I, being so much more adept with a needle, used a fine beading needle. (and my trusty thimble) You must sew across one thread only on the right side, so the comb won't get caught in the stitching.


Here is the bottom edge at the nape. About 1/2" needs to be double knotted because the hairs are thicker (2 or 3 hairs tied together here - the 'root' will never show) and going through more layers - there is a 3/8" hem all the way around a cap. The hairs are tied through all the layers, but over only one top thread of the lace. Very difficult. Also, getting into the neck with the tool is difficult. This is the hardest part, and learning with the kinky hair makes it even more of a challenge.

Tying the knots is exactly like putting on fringe with a crochet hook, only instead of folding the hair in half and ending up with 2 strands, you just fold over about 1/2". Hair has a 'grain' (cuticle) and must be applied with the root end at the cap and the cut end at the...end. If not, it will never lay smoothly or in the case of Afro-kinky hair, the cuticles going north will lock with the cuticles going south and make a huge snarly mess. Or so I am told. I don't want to find out, as it takes about a million hours to make a wig. What you see here (just the ventilation) has taken me about 12 hours so far. I am actually getting faster!

The double knot is made like a single and then a chain one, to use crochet tems.

And in case you were wondering, yes, I am still into this!

But not to the point of (ever) giving up my knitting. See the next post.

Sunday, January 07, 2007

Holiday Gifts Revealed

Now that they have been given out, I can show you some of the gifts I made for friends and family for the holidays.

Here are some beaded, knitted bracelets. I bought the original kit from Earth Faire. If you click on this link, you will see a bracelet kit for Valentine's Day that is just gorgeous. They are knitted on 0 needles - not really as bad as you would think. It takes longer to put the beads on than it does to make the entire bracelet. The boxes were purchased from a bead store in Pasadena, where I went to buy more beads to make more bracelets (like I didn't already have enough beads in my stash)

This is my Reversible Cable Scarf and Gauntlets, made in Foliage instead of Paton's SWS, as called for in the pattern. I gave this one to my niece and the Foliage to her mom, my sister. Her birthday happens to be today, and her gift isn't finished yet. Happy Birthday Julie! I know you love to keep those gifts rolling in all month!

This is the Charlotte's Web I made in Applelaine Yarn. It was for my other niece, Aimee. She loves purple. At 8 years old, I must say she has learned how to crochet and knit faster than any other student I've ever taught, including adults!


And this last photo is a new pattern I am working on for Koigu. It is called Electric Sox and will include 3 different sock patterns, all with beads knitted in (electric...the beads look like they are tiny light bulbs) This one is called Electric Flowers. There are also Electric Zig Zag and Electric Argyle. I will post pictures as they are completed and will link to the pattern when it is finished.

I'm also working on a couple of other patterns for Koigu (sweaters) and hope to have them finished in time for Stitches West in February.

Wednesday, December 27, 2006

Soft Sunset Sweater is Finished


I have been laid low with that cold that has swept the nation, but I managed to finish the Soft Sunset Sweater. I haven't blocked it yet or woven in the millions of ends, but here she is!

As soon as I have completely recovered, I will try to find someone to model it, and shoot it again.


Here is a close-up of the stitch detail. I used over 2 dozen different yarns in different combinations, never repeating them in the entire sequence. It was a dream to make, and aside from some major frogging where the sleeves joined the body (I changed the original design after seeing how it was coming together) it was a very enjoyable experience to make.

Reese's Birthday

Many years ago I went to a Moroccan restaurant on Sunset Blvd. called Dar Maghreb. I think it is still there, although we haven't been there in 15 or 20 years, ever since I learned how to make Moroccan food. I remember the dress I wore - it was an ivory wool, hand-knit dress with a fitted bodice and long, full skirt that clung in a demure way and that I wouldn't dream of wearing now, even if I still had it.

The restaurant was like entering a Moroccan palace. Made entirely of handpainted tiles in blues and greens, yellows and reds, with a fountain in the lobby and carved screens separating the diners. We sat on tasseled silk pillows on the floor and the tables were made of etched brass trays. There were belly dancers and waiters in Aladdin costumes with pointy toed slippers and fezes served course after course of the most exotic foods, which we ate and fed each other with our fingers.


Last night I made bisteeyah for my family.

Accompanied by chicken with lemon and olives and curried vegetables with cous cous.

Here are my own recipes, developed over the years and always subject to creative interpretation:

Chicken With Lemon and Olives
1 large chicken, whole
6 - 8 fresh garlic cloves
1 jar green olives with pimentos
1 onion
Lowery's Seasoning Salt
black pepper
cayenne pepper
3 - 4 small lemons (I use the ones from my Myer's lemon tree, if available)

Thoroughly wash chicken and place in roasting pan. Peel and quarter onion and stuff into chicken's cavity. Squeeze juice from lemons, pour juice over chicken and stuff remaining lemon halves into chicken's cavity. Pour entire contents of olive jar over chicken, including brine. Season chicken with Lowery's, black pepper and cayenne.

Place in pre-heated, 350 degree oven for 3 hours, basting frequently (about every 15 minutes)

To serve, remove skin, onions and lemons, slice and spoon drippings with roasted olives over meat on a platter.


Curried Vegetables
2 - 3 sweet potatoes, peeled and cubed
2 - 3 dozen baby squashes or zucchini
1/2 onion, chopped fine
2 T olive oil
1 cup chicken broth
butter
curry powder
Lowery's Seasoning Salt
black pepper
cumin
coriander
garlic powder

Preheat wok, add olive oil and butter. Stir fry vegetables for a couple of minutes on high heat, then reduce heat and add chicken broth and seasonings. Cover and simmer to desired degree of softness. Serve over cous cous.

Bisteeya
1 small chicken
1 small onion
5 or 6 cloves garlic
8 eggs
1 bunch chopped green onions, including stems
1 - 2 chicken livers (Optional but they do add a certain texture you won't get without them)
1 package philo dough
2 - 3 sticks of butter (did I say this was a healthy dish?)
powdered sugar
cinnamon
pine nuts
slivered almonds
saffron
coriander
ground cloves
salt
cayenne pepper

Clean chicken and place in roasting pan. Cut garlic cloves in halves and place under chicken skin evenly all over the chicken. Peel onion and put into chicken cavity. Salt and pepper. Roast in preheated 350 degree oven 2 or more hours, basting frequently and adding water if necessary to keep chicken moist. Roast until meat falls off the bones.

Remove chicken from pan and allow to cool. Remove skin, garlic cloves, onion and bones and shred chicken with fingers into bite sized pieces. This can be done the day before, up to this point.

Melt about 1/2 stick butter in saute pan. Gently saute chopped green onions with chicken livers, until liver is pink. Remove livers from pan and smash with a fork.

Beat eggs with spices and scramble in butter with onions on very low heat. Add smashed chicken livers and scramble together. Do not over cook.

Use a round pyrex bowl to assemble the bisteeya. Melt remaining butter and with pastry brush, coat inside of bowl with butter. Unroll layers of philo dough that has been warmed to room temperature. Place one sheet in bowl and press gently to sides, leaving remainder of each sheet draped over the edge of the bowl. *Brush the surface of this sheet with butter, being careful not to tear the tender sheet. Place another sheet in, forming an 'x'. In other words, one sheet goes north south, the next goes east west, followed by another north south, etc. Every 4th sheet, sprinkle some powdered sugar from a sifter over the bottom. Rep from * until you have assembled about 15 or 16 sheets, being careful not to use too much butter, but just enough to stick the sheets together. Do not be skimpy with the powdered sugar. This seems like a lot, but the sheets are thinner than paper and the crust will be thin, even if you use the entire package, which I never do.

Butter last layer and *sprinkle in a handful of pine nuts and a handful of slivered almonds. Cover with powdered sugar and a sprinkle of cinnamon. Add a layer of chicken pieces and then half the egg mixture. Rep from * one more time, then wrap with the layers of philo dough that are hanging over the edge of the bowl, sticking them together with brushes of butter. Wrap everything up tightly. It is not essential that these layers be totally stuck together, as this will be the bottom of the finished pie when removed from the bowl.

Bake at 350 degrees for 45 minutes, (the last 45 minutes of the chicken with olives)

To serve, place serving platter on top of bowl and invert. If you used the right amount of butter, it will come out clean and dry. If you used too much, you will have to pour the excess off before inverting. (ask me how I know this)

Sprinkle powdered sugar on top. After everyone has admired it, cut into wedges and have everyone eat from the serving plate with their (clean) hands.

I recommend only making this for someone you really love, as it is a huge PIA and takes up a lot of knitting time!

Tuesday, December 19, 2006

This is Totally Hysterical

Click here for your holiday greeting from Elf-ene! (Thanks, Cara!)

Sunday, December 17, 2006

Design Process

One of my fiber-sister, favorite bloggers, Jane Thornley, shares some of her design process in her blog, which you can find here. Today she posted "Welcome to my Head" so I thought I would share a little bit of my own head.

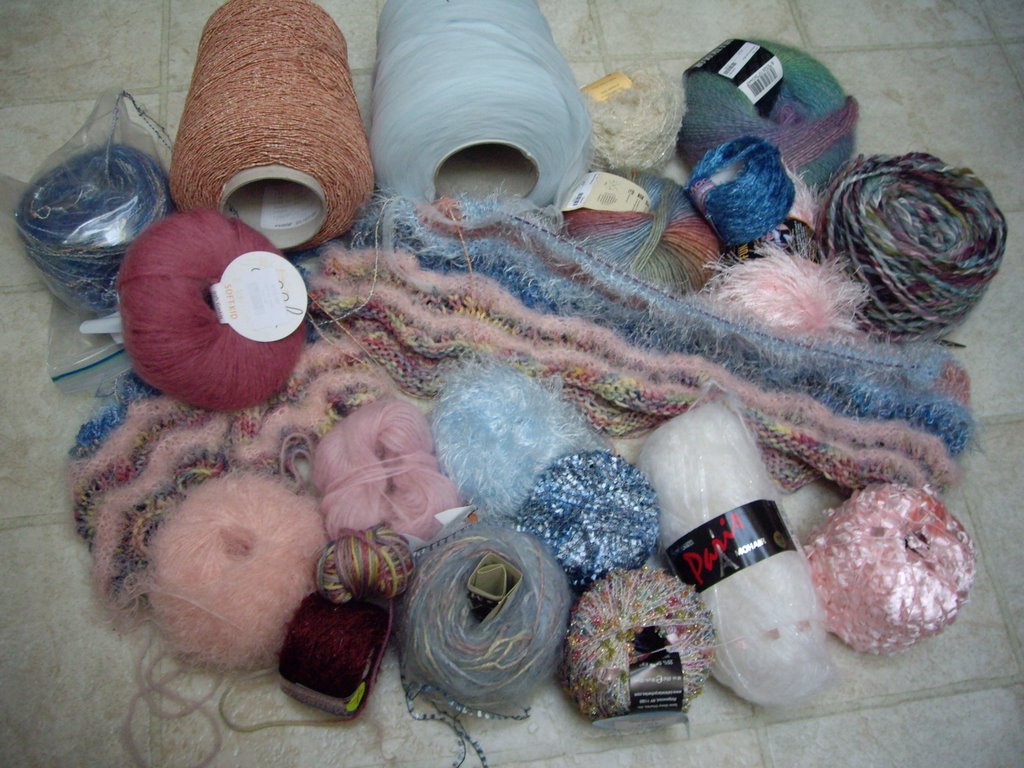
This is the beginning of a new design, which I am temporarily calling "Sunset Sweater".
The colors were all inspired by a skein of Koigu Kersti (what remains is a little ball right above the spool of deep burgundy near the bottom left corner of the pile)

The colors remind me of the colors of the sky during the gentle sunsets we sometimes have, after the brilliant colors have sunken down below the horizon and all that remain are the paler reflections.

Toward the center of the photo are the beginnings of the body, knit circularly, and the sleeves, both sleeves knit on one circ at the same time. I am working a wavy stitch pattern adapted from one of my favorite stitch pattern books, "Ripple Stitch Patterns".

I work the body and sleeves at the same time because it's easier for me to keep track of the changes and also, when I finish one part, the whole thing is finished!

My recent visit to The Knitter's Studio for the first time evoked a buying spree that broke my yarn fast, one month earlier than I had promised myself. After that last glut of Koigu, I had promised myself not to buy yarn till after the first of the year. (the 2 e-bay purchases did not count)

But the way Liz arranges her yarn by color broke through my defenses. I had just been talking to Reese about astral colors and the yarns...well, you all know how yarn effects me.

At first I thought I would buy a lot more of the Kersti, and just put traces of the other fibers into the sweater, but I didn't want to wait to continue knitting and the prospect of driving through LA crazy holiday shopper traffic to get back to the Knitter's Studio swayed my decision heaviliy into the 'use what you already have' side of the process, so here it is.

So far I am pleased with the sweater. That's not to say it will reach completion. I have a terrible point in every piece where I think I hate it and consider chucking the whole thing. This happens EVERY TIME I make something, whether it is my own design or someone else's.

Will let you know what happens.

Tuesday, December 12, 2006

Bee Socks and Vibrant Sweater


Some socks made for a dear friend for Hanukkah. Yarn: Lorna's Laces.

This sweater has pleased me to no end. The yarn was purchased on e-bay and was a great bargain. The body is a basic one that I find looks the best on me. I started it on Friday and finished it on Monday, knitting most of my waking hours while listening to Jane Eyre from Audible.

I have been wanting to submit another design to Creative Knitting and think I will try this one.

Wednesday, December 06, 2006

I Swear I am Not Awaiting a Sex Change!


No. I am all girl. Well, predominantly (see test results below)

I am just trying to learn how to make wigs and have no one to model my homework. Figaro (el gato) point blank refused, saying she is already covered with her own hair, thank you very much.

It took me about 20 hours to complete this goatee. It involved shaping the lace to contour the chin. You stitch tiny darts into the tulle with clear, monofiliment thread. The darts must be stitched RS and WS. I wasn't able to get a fine enough focus with my camera to show this step.


Here is the goatee nearly finished, before trimming. Remember Gabby Hayes?

Here it is trimmed and on it's own. Like a little living thing. A hedgehog?


It does contour to the chin quite well.

The complete set.

BTW, detaching the glue strip from my face was like using Biore pore strips.

Monday, December 04, 2006

Scarf Style 'Color on Color'


A super effective procrastination project. Instead of working on my next assignment - a goatee! or Reese's birthday sweater (almost done - just one sleeve to sew on and then sew up the side - I started this beautiful scarf. I always wanted to make it, and found an online store that was offering all the yarns in a kit. Now I'm supposed to be on a yarn fast, but something came over me and before I had time to pull my will power out of the closet, I had pulled my credit card out of my purse and ... ooops.

So you can see why when it arrived a couple of days later, I just had to start it!

And I HATE IT SO MUCH. It's not the colors - I ADORE the colors! I don't mind changing colors and the fairisle and intarsia. Actually, I have been playing with ideas along these lines in my designer dream notebook, and thought this project would warm me up for my own work.

What I hate is THE YARN. It is wool tapestry yarn. It is scratchy! It comes in these tiny little skeins. You must separate the 3 strands and use only one or 2 at a time. You must hunt through every skein for the correct number. Before you can change colors you must do this process and then wind the remaining strand around the band so you don't lose track of its number.

It is slow and painful and I don't like the way it feels or the way the stitches look. I actually started making it on the knitting machine, but I'm not about to turn every other row with a garter bar for the garter stitch. You can be sure the i-cord will be made on the machine. If I ever get to it.

There were a few colors missing from the kit. I didn't bother to inform the store because I don't want to wait to receive the missing yarn, so I'm improvising. I'm about a whisker away from improvising on the pattern, too, which is starting to get to me.


Here are all the remainders. You have to keep them because the pattern calls for them later on. Every time you get to a new color (about every 10 minutes) you need to look through each remainder and then through the unseparated ones.

I'm listening to Autobiography of a Yogi while I work on this, so it is keeping me from flipping out.

Saturday, December 02, 2006

How Feminine R U?

You Are 73% Feminine, 27% Masculine

You are in touch with your feminine side.
Sensitive, intuitive, and caring are all words that describe you.
And you're just masculine enough to relate to both men and women.


So you see, I am just masculine enough to have a (removable) moustache!!!

Saturday, November 18, 2006

My Moustache

Thursday I had my first 'lesson' with Victoria Wood. She has a studio behind her house in Long Beach. I was amazed to realize it doesn't take me any longer to get to Long Beach (1/2 hour) than it does to take Eden to school. Of course, it adds up - 1/2 hour to school, 1/2 hour home, 1/2 hour to LB, 1 hour back to school, 1/2 hour back home. That means I spent 3 hours driving on Thursday!

Anyway, she has a small room with set ups for 3 plus herself. She also has women who sub-contract in their homes. In another room she keeps all her hair. Straight, curly, wavy, every color and everything in between. In another room she has shelves and shelves of head blocks, each customized for her individual clients. The names written on the heads read like the credits from every movie you've ever seen.

First she had 2 of her ventilators show me their techniques. This is a ventilation tool. You will probably have to click on the photo to enlarge it so you can see the teeny tiny hook.


This is what I have to wear to see the hook and the tiny threads of the net that you tie the hairs around.


She continued my lesson by beginning to discuss the techniques used to create the custom caps from nylon netting. I had no idea that netting has a grain and different bias grains. The bias isn't just at a 90 degree line from the length-wise grain. Not only does this make a difference in fitting the cap to the head, it will also be a factor in the way the hair falls. Using the wrong bias grain on a moustache, for instance, will make it so the two sides never lie equally smoothly along the face.

I got really nervous about grain. Imagine doing all the work of ventilating about a gazillion tiny hairs onto a head cap and then the hair doesn't move correctly and the entire film is RUINED! Well, not really ruined, but delayed and you are blacklisted from ever being called by a hairstylist to work on another film because you used an incorrect bias!

While I was there, Sam Jackson's hair stylist came by to discuss Sam's hair needs for his new film. He brought a couple of Vikki's older wigs with him (I'm not sure why). They absolutely blew my mind! One was almost white, but on closer inspection was really very pale grey with little bits of black. It was cropped very short and almost looked like it was felted (a knitterly interpretation) The hairline was complicated and incredible! Even on the head block, it looked absolutely real!

The other was from the film 'Jackie Brown'.

This is an amazing accomplishment because the hair is very thin on the top and sides and you can see his actual scalp coming through. I had no idea how this was accomplished before, but now I know the secret. I am amazed.

This makes knitting a sweater seem like a walk in the park. Will I ever be able to make something like this? Will I be able to see well enough? Am I insane to spend time trying to learn?

My first assignment was to make a moustache. Vikki says a moustache has all the elements of a wig without needing all the ventilating. It has an edge like a hairline and the hairs grow in different directions, just like on head. The color and texture has gradations.

Since I groom my DH's moustache, I am quite familiar with all that. I decided to make a moustache just like his. It took me about 8 hours.


Here is the unused hair - 3 shades. The curl on a moustache is looser than on the head.


Here is my finished moustache before trimming. Can you see the light hairs at the top?


After trimming. By the way, the black outline is a guide and is drawn on the form underneath the net the moustache is made on.


And here it is as if being worn. (I haven't learned what to do with the net edges yet)